Bookmarks in terminal

Standard

Today I found a great tool to ease the navigation in the terminal, called apparix. It lets you bookmark a folder so that you easily can navigate to it just by typing

to nameofbookmark

To install apparix in Ubuntu, type

sudo apt-get install apparix

in a terminal window.

After installation, you need to set up the aliases “bm” for bookmarking and “to” for going to a bookmark by adding a few functions to your .bashrc file in your home folder (if you don’t have this file, you can create it yourself).

You’ll find the functions you need to add by issuing the command

apparix –shell-examples

in a terminal window. Copy everything below “Bash-style functions” except the “CSH-style aliases”. Paste this into your .bashrc file.

Open up a new terminal, cd to your directory of choice and type

bm mybookmark

to bookmark the folder. Afterward, you can go to any folder and type

to mybookmark

to go to your bookmark.

This tool is, of course, available for other Linux distributions too.


Reference : http://dragly.org/2011/11/01/bookmarks-in-terminal/

How To Configure vsftpd to Use SSL/TLS on an Ubuntu VPS

Standard

Introduction

Warning: FTP is inherently insecure! Consider using SFTP instead of FTP.

FTP, or file transfer protocol, was a popular way to transfer files between local and remote computers in the past. The protocol is inherently insecure, so its usage has fallen out of favor.

If you still want to use FTP instead of a more secure alternative like SFTP, which uses the SSH protocol to implement file transfers, you can secure it somewhat by configuring FTP to use SSL.

In this guide, we will configure vsftpd to use SSL certificates on an Ubuntu 12.04 VPS.

Install vsftpd

The vsftpd server is available in Ubuntu’s default repositories. You can install it by typing:

sudo apt-get install vsftpd

We now have vsftpd on our server, but we still must configure it.

Configure Basic vsftpd Functionality

The default configuration file is at /etc/vsftpd.conf. Open it with root privileges:

sudo nano /etc/vsftpd.conf

Disable the ability for users to log in anonymously by finding the anonymous_enable parameter and changing it to read “NO”:

anonymous_enable=NO

Next, we need to enable user logins that use the local authentication files, since we disabled anonymous access. Uncomment this line:

local_enable=YES

To enable users to make modifications to the filesystem, we will uncomment the write_enableparameter as well:

write_enable=YES

Additionally, uncomment the chroot_local_user option to restrict users to their own home directories:

chroot_local_user=YES

Save and close the file.

Create an FTP User

Because of the way vsftpd secures its chroot jails, the chroot must not be owned by the user and must not be writeable. Because of this, it is best to implement a user specifically for use with FTP.

Create the user like this:

sudo adduser ftpuser

Assign a password and feel free to press “ENTER” through the other prompts. Now, give root ownership of the ftpuser’s home directory:

sudo chown root:root /home/ftpuser

We need to create a separate directory within this home directory where files can be uploaded. Then, we need to give this directory over to our FTP user:

sudo mkdir /home/ftpuser/files
sudo chown ftpuser:ftpuser /home/ftpuser/files

Now, we should be able to log in (insecurely) as the ftpuser and upload files to the files directory.

Configure SSL with vsftpd

We need to create some SSL certificates to use with vsftpd. We can do this with the following command:

sudo openssl req -x509 -nodes -days 365 -newkey rsa:1024 -keyout /etc/ssl/private/vsftpd.pem -out /etc/ssl/private/vsftpd.pem

This will create a certificate that will last a year. It will be placed in the /etc/ssl/private/ directory, which we can reference in our configuration file.

Add the SSL Details to the vsftpd Configuration

Open the vsftpd configuration file again with root privileges:

sudo nano /etc/vsftpd.conf

Towards the bottom of the file, you should find a line that matches the SSL certificate we just created:

rsa_cert_file=/etc/ssl/private/vsftpd.pem

We will add the additional SSL info below this.

When we created the certificate, we included both the key file and the certificate in one file, so we can also point our private key line to that:

rsa_private_key_file=/etc/ssl/private/vsftpd.pem

After that, we will add the following lines to force SSL. This will restrict clients that can’t deal with TLS, but that is what we want.

ssl_enable=YES
allow_anon_ssl=NO
force_local_data_ssl=YES
force_local_logins_ssl=YES

After this we configure the server to use TLS, which is actually a successor to SSL, and preferred:

ssl_tlsv1=YES
ssl_sslv2=NO
ssl_sslv3=NO

Finally, we will require add some additional options to flesh out our configuration file:

require_ssl_reuse=NO
ssl_ciphers=HIGH

Save and close the file.

Now, we need to restart our server for our changes to take effect:

sudo service vsftpd restart

How To Connect to the Server with FileZilla

Most modern FTP clients can be configured to use SSL and TLS encryption. We will be demonstrating how to connect using FileZilla due to its cross platform support.

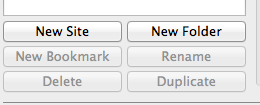
In the configuration panel, you should see a button on the far left to open “Site Manager”. Click this:

FileZilla Open Site Manager

Click on “New Site” in the bottom right corner of the window interface that appears:

FileZilla New Site

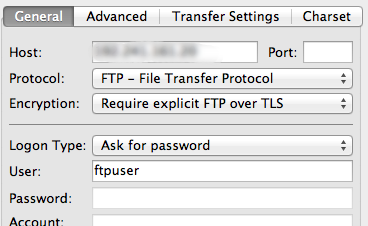
Name the new configuration. Fill out the IP address. Under the “Encryption” drop down menu, select “Require explicit FTP over TLS”.

For “Logon Type”, select “Ask for password”. Fill in the ftp user you created in the “User” field:

FileZilla Server Configuration

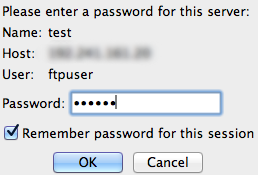
Click “Connect” at the bottom of the interface. You will be asked for your user’s password:

FileZilla user password

You will then be asked to accept the TLS certificate:

FileZilla Server Certificate

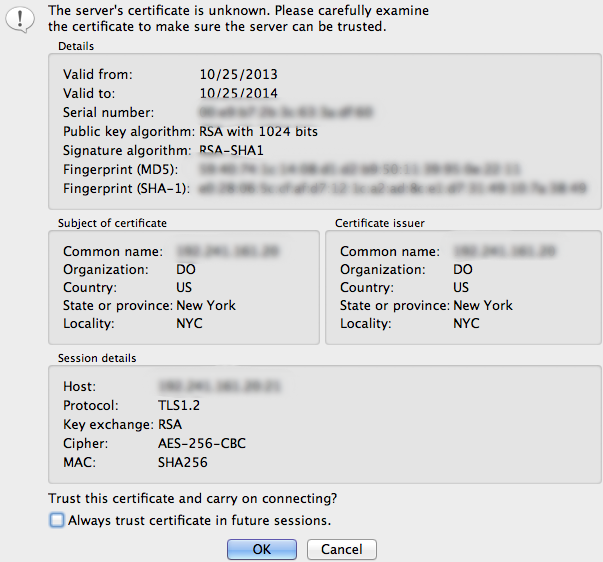
You should now be connected with your server with TLS/SSL encryption.

Conclusion

This setup improves the security of FTP, but it still suffers from insecurity when establishing a connection. If at all possible, it is better to switch to SFTP for these kinds of operations. However, if you do decide to go with FTP, you should make sure to use TLS/SSL whenever possible.


Reference : https://www.digitalocean.com/community/tutorials/how-to-configure-vsftpd-to-use-ssl-tls-on-an-ubuntu-vps


Credits : https://www.digitalocean.com/community/users/jellingwood

How To Install Linux, Apache, MySQL, PHP (LAMP) stack on Ubuntu

Standard

About LAMP

LAMP stack is a group of open source software used to get web servers up and running. The acronym stands for Linux, Apache, MySQL, and PHP. Since the virtual private server is already running Ubuntu, the linux part is taken care of. Here is how to install the rest.

Set Up

The steps in this tutorial require the user to have root privileges on your VPS. You can see how to set that up in the Initial Server Setup in steps 3 and 4.

Step 1: Install Apache

Apache is a free open source software which runs over 50% of the world’s web servers.

To install apache, open terminal and type in these commands:

sudo apt-get update
sudo apt-get install apache2

That’s it. To check if Apache is installed, direct your browser to your server’s IP address (eg. http://12.34.56.789). The page should display the words “It works!” like this.

How to Find your Server’s IP address

You can run the following command to reveal your server’s IP address.

ifconfig eth0 | grep inet | awk '{ print $2 }'

Step 2: Install MySQL

MySQL is a powerful database management system used for organizing and retrieving data

To install MySQL, open terminal and type in these commands:

sudo apt-get install mysql-server libapache2-mod-auth-mysql php5-mysql

During the installation, MySQL will ask you to set a root password. If you miss the chance to set the password while the program is installing, it is very easy to set the password later from within the MySQL shell.

Once you have installed MySQL, we should activate it with this command:

sudo mysql_install_db

Finish up by running the MySQL set up script:

sudo /usr/bin/mysql_secure_installation

The prompt will ask you for your current root password.

Type it in.

Enter current password for root (enter for none): 

OK, successfully used password, moving on...

Then the prompt will ask you if you want to change the root password. Go ahead and choose N and move on to the next steps.

It’s easiest just to say Yes to all the options. At the end, MySQL will reload and implement the new changes.

By default, a MySQL installation has an anonymous user, allowing anyone
to log into MySQL without having to have a user account created for
them.  This is intended only for testing, and to make the installation
go a bit smoother.  You should remove them before moving into a
production environment.

Remove anonymous users? [Y/n] y                                            
 ... Success!

Normally, root should only be allowed to connect from 'localhost'.  This
ensures that someone cannot guess at the root password from the network.

Disallow root login remotely? [Y/n] y
... Success!

By default, MySQL comes with a database named 'test' that anyone can
access.  This is also intended only for testing, and should be removed
before moving into a production environment.

Remove test database and access to it? [Y/n] y
 - Dropping test database...
 ... Success!
 - Removing privileges on test database...
 ... Success!

Reloading the privilege tables will ensure that all changes made so far
will take effect immediately.

Reload privilege tables now? [Y/n] y
 ... Success!

Cleaning up...

Once you’re done with that you can finish up by installing PHP.

Step 3: Install PHP

PHP is an open source web scripting language that is widely use to build dynamic webpages.

To install PHP, open terminal and type in this command.

sudo apt-get install php5 libapache2-mod-php5 php5-mcrypt

After you answer yes to the prompt twice, PHP will install itself.

It may also be useful to add php to the directory index, to serve the relevant php index files:

sudo nano /etc/apache2/mods-enabled/dir.conf

Add index.php to the beginning of index files. The page should now look like this:

<IfModule mod_dir.c>

          DirectoryIndex index.php index.html index.cgi index.pl index.php index.xhtml index.htm

</IfModule>

PHP Modules

PHP also has a variety of useful libraries and modules that you can add onto your virtual server. You can see the libraries that are available.

apt-cache search php5-

Terminal will then display the list of possible modules. The beginning looks like this:

php5-cgi - server-side, HTML-embedded scripting language (CGI binary)
php5-cli - command-line interpreter for the php5 scripting language
php5-common - Common files for packages built from the php5 source
php5-curl - CURL module for php5
php5-dbg - Debug symbols for PHP5
php5-dev - Files for PHP5 module development
php5-gd - GD module for php5
php5-gmp - GMP module for php5
php5-ldap - LDAP module for php5
php5-mysql - MySQL module for php5
php5-odbc - ODBC module for php5
php5-pgsql - PostgreSQL module for php5
php5-pspell - pspell module for php5
php5-recode - recode module for php5
php5-snmp - SNMP module for php5
php5-sqlite - SQLite module for php5
php5-tidy - tidy module for php5
php5-xmlrpc - XML-RPC module for php5
php5-xsl - XSL module for php5
php5-adodb - Extension optimising the ADOdb database abstraction library
php5-auth-pam - A PHP5 extension for PAM authentication
[...]

Once you decide to install the module, type:

sudo apt-get install name of the module

You can install multiple libraries at once by separating the name of each module with a space.

Congratulations! You now have LAMP stack on your droplet!

Step 4: RESULTS — See PHP on your Server

Although LAMP is installed, we can still take a look and see the components online by creating a quick php info page

To set this up, first create a new file:

sudo nano /var/www/info.php

Add in the following line:

<?php
phpinfo();
?>

Then Save and Exit.

Restart apache so that all of the changes take effect:

sudo service apache2 restart

Finish up by visiting your php info page (make sure you replace the example ip address with your correct one): http://12.34.56.789/info.php

It should look similar to this.

See More

After installing LAMP, you can Set Up phpMyAdmin, Install WordPress, go on to do more with MySQL (A Basic MySQL Tutorial), Create an SSL Certificate, or Install an FTP Server.


Reference : https://www.digitalocean.com/community/tutorials/how-to-install-linux-apache-mysql-php-lamp-stack-on-ubuntu


Create FTP in Ubuntu EC2

Standard

sudo apt install vsftpd

and edit vsftpd.conf file emacs /etc/vsftpd.conf


listen=YES
anonymous_enable=NO
local_enable=YES
write_enable=YES
local_umask=002 #
Umask and final permissions that you need should add up to 777. Since you need 775 permissions, you need 777 – 775 = 002 as umask.


allow_writeable_chroot=YES
pasv_addr_resolve=NO
pasv_address=x.x.x.x
local_root=/var/www/html/
pasv_enable=YES
pasv_min_port=13000 #enable this inbound ports 13000-13100 from security group
pasv_max_port=13100
port_enable=YES


Note: “chmod 777 -R /var/www” to enable write permissions

Add users

sudo adduser fptuser

then  try to connect this should work

This configuration fixes following issues.
1.Server sent passive reply with unroutable address. Using server address instead
2.Command: LIST Error: Connection timed out
Error: Failed to retrieve directory listing.
3.503 password incorrect


References:

https://in.godaddy.com/help/how-to-set-up-an-ftp-server-on-ubuntu-1404-12301

Doing what I love to do

Standard

During the college itself I’m so curious to learn or do something. Unfortunately I spend more than 2 years with C language. Did more than 6 application using C alone.  It has been around one and half year since started my career. After joined into the company started to learn new languages and technologies. I cannot express my happiness when my code released first time. started to understand tester vs developer jokes :-p .

I love to working with web apps (PHP , JQuery) even I just wanted to learn new languages because as i told, already spent my 2 year with C alone. it quite boring sitting in a same language so started to learn Android and Nodejs(server). Got an idea (Selfie Face) and currently working on that.

I’m really enjoying to work with codes and getting bugs , solving them and learning from that. till now everything going good. I’m so satisfied with my work. really I’m loving what I do now.